Table of Contents
ToggleA sloped backyard can feel like a liability, awkward to navigate, hard to use, and prone to erosion. But what looks like a problem is actually an opportunity. Hillside yards offer dramatic potential for creative landscaping that flat properties simply can’t match. Whether you’re working with a gentle slope or steep terrain, transforming uneven ground into functional, beautiful outdoor space is entirely achievable with the right approach. From structural solutions like retaining walls to strategic plantings and smart hardscaping, backyard hill landscaping ideas can turn that challenging slope into your yard’s best feature.
Key Takeaways
- Backyard hill landscaping ideas transform sloped yards into functional spaces using retaining walls for terracing, with concrete blocks and timber offering affordable, durable options for structural support.
- Native plants with deep root systems and strategic ground cover placement prevent erosion while requiring less maintenance than traditional lawn on steep slopes.
- Well-designed hardscaping including stone steps, gravel paths, and proper drainage with French drains and swales makes sloped yards safe and visually appealing.
- Strategic outdoor lighting with low-voltage LED step lights prevents tripping hazards and highlights landscape features while maintaining safety on sloped terrain.
- Proper water management through rain gardens, swales, and drainage integration transforms water runoff from a liability into a design asset that adds visual interest to your landscape.
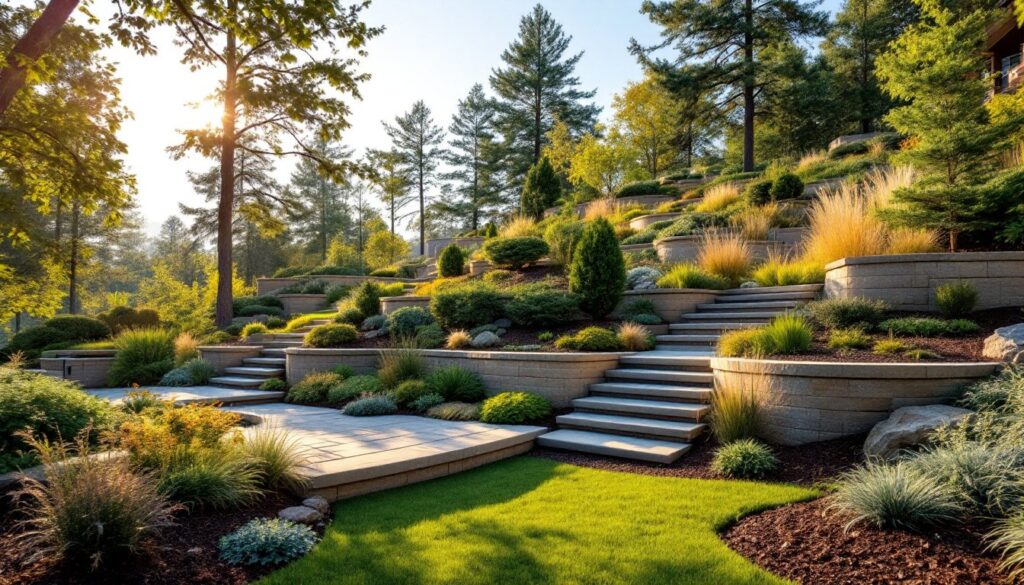
Terracing and Tiered Planting
Building Retaining Walls for Structural Support
Terracing is the workhorse solution for sloped yards. By cutting the hill into level steps held in place by retaining walls, you create usable planting beds, seating areas, and flat ground where there was none before. Start by assessing your slope’s angle and soil composition, clay drains differently than sandy loam, which affects water pressure on the wall and foundation design.
Retaining walls come in several materials. Pressure-treated wood (6×6 or 6×8 timbers) is affordable and straightforward for homeowners: expect 10–15 year lifespan depending on climate and drainage. Segmental concrete blocks (those interlocking units) are durable, attractive, and don’t require posts, they lock together mechanically. For high-end permanence, bricks for landscaping offer classic appeal and longevity, though they cost more and may need professional installation for structural walls over 3 feet tall.
Height matters legally. Check your local building codes, most jurisdictions require a permit and engineered design for retaining walls over 4 feet. The International Building Code (IBC) specifies drainage and compaction requirements to prevent failure. Even if your wall is below that threshold, proper drainage behind the wall is non-negotiable. Install perforated drainage pipe at the base and backfill with gravel, not native soil. Without it, hydrostatic pressure builds up, walls bow, and failure happens fast.
For a DIY build under 3 feet, concrete blocks or timber work fine if soil is stable. Level each course carefully, use a long level or laser level. Backfill with compacted gravel in 6-inch lifts. For anything taller or on steep slopes, hire a professional. This is structural work: mistakes cost thousands to fix.
Native Plants and Ground Covers for Slopes
Erosion Control with Strategic Plantings
Once structure is in place, plants lock the soil. Native plants are your best bet, they’re adapted to local rainfall, soil type, and temperature swings, so they thrive with less maintenance and supplemental water. Deep root systems (particularly perennials and shrubs) prevent topsoil from washing away during heavy rains.
Choose ground covers for shallow slopes and plant spacing. Creeping sedums, creeping phlox, and native junipers (depending on your region) spread horizontally and bind soil. In colder zones, consider native grasses like little bluestem or Pennsylvania sedge. In southern regions, native muhly grass or native azaleas work well. Avoid lawn on slopes steeper than 30 degrees, mowing is dangerous, and grass alone doesn’t prevent erosion on steep grades.
For mid-slope stability, layer shrubs (2–3 feet tall) behind ground covers. Native dogwoods, serviceberries, or deciduous hollies add structure and let water drain through their canopy. Space plants tighter on slopes than on flat ground, 12-18 inches apart instead of 24, so roots interlace faster. Mulch with 2–3 inches of shredded bark to reduce runoff and moderate soil temperature, but keep mulch 6 inches away from plant stems to prevent rot.
Timing matters. Plant in fall or early spring when soil is moist and plants are dormant. Amend compacted backfill soil with compost before planting: native plants appreciate it even if they tolerate poor soil. Water deeply and less frequently after establishment (usually by mid-summer of the second year) to encourage deep rooting rather than shallow, weak growth. This approach, combining structural terracing with strategic plant selection, addresses both the immediate safety issue and the long-term aesthetic and ecological success of your slope.
Hardscaping Features and Pathways
Stairs and paths make sloped yards functional and safe. Without them, residents and guests traverse the hill recklessly, creating desire paths that promote erosion and potential injury. Well-designed hardscaping transforms a slope into an intentional landscape.
Stone or timber steps are the primary choice. Natural stone (flagstone, slate, limestone) offers durability and visual warmth: expect $15–40 per square foot installed, varying by region and stone type. Timber risers with stone or gravel treads are DIY-friendly and cost less upfront, though timber (even pressure-treated) lasts 10–15 years on slopes with heavy foot traffic. For steep slopes, consider landscape steps, manufactured modular units that interlock and require no mortar, making them semi-DIY accessible.
Walking paths can be mulch, gravel, pavers, or stepping stones. Crushed granite landscaping drains well, looks clean, and costs $3–8 per square foot: it compacts nicely on slopes if edged properly. Polymeric sand or gravel stabilizers keep it in place on inclines. Stepping stones (natural stone or composite pavers set into mulch) provide visual rhythm and distribute foot traffic, reducing erosion.
Width and slope affect usability. Paths should be at least 2 feet wide for single-file foot traffic, wider if two people need to walk side-by-side. Limit path grade to 10–15 percent (a 1-foot rise per 6–10 feet of run) for comfortable walking: steeper slopes require steps. Install French drains or swales alongside paths to manage runoff and prevent pooling. Small details, edge the path with plastic or metal edging, grade slightly off the path for drainage, prevent erosion and extend path life significantly.
Water Features and Drainage Solutions
Water is both the enemy and a design asset on slopes. Manage it poorly and you get erosion, flooding, and foundation issues: manage it well and you gain visual interest and functional beauty. Integrate drainage into your design, not as an afterthought.
French drains and swales redirect runoff away from structures and stable ground. A French drain is a perforated pipe buried in a trench filled with gravel: it collects subsurface water and channels it downhill or to a drainage system. A swale is a shallow, vegetated channel that slows and filters surface runoff. Both are essential if you’re building on a slope. Slope them at least 1 percent (a 1-foot drop per 100 feet of run, though steeper is better), use a transit level or laser to confirm.
Rain gardens planted in low spots capture runoff and let it percolate slowly instead of running off. They’re both functional and beautiful: 4–6 inches deep, planted with native moisture-tolerant plants like buttonbush, joe-pye weed, or black-eyed Susan. They reduce flooding, recharge groundwater, and filter pollutants naturally. Plant them 10 feet from foundations to avoid water damage to your home.
Water features, small ponds, pondless fountains, or cascading streams, add visual drama and mask noise from nearby streets. A small recirculating fountain or stream doesn’t require as much water as you’d think: pumps are efficient and water recycles. Site them mid-slope where runoff naturally flows, or use a small basin and pump system. Ensure electrical work meets NEC code: hire a licensed electrician if you’re not confident. Water features need maintenance, skimming debris, checking pump function, but the payoff in visual and ambient appeal is substantial.
Lighting and Visibility on Sloped Yards
Sloped yards are harder to navigate at dusk or dark. Inadequate lighting creates hazards, tripping on steps, missing the path, and wastes the visual potential of your landscaping after sunset. Strategic outdoor lighting transforms an evening liability into an asset.
Step and pathway lighting prevents trips. Low-voltage LED step lights (2–4 watts each) mount on risers or flanking walls and cost $20–50 each: install them 18 inches apart. Solar step lights are cheaper upfront ($10–20 each) but less reliable in cloudy climates: they dim over time as sensors collect dust. Wired low-voltage systems (12V transformer, run buried cable) are more work to install but offer consistent brightness and longevity. Uplighting or spotlights on trees or shrubs add depth and highlight landscape features without creating glare that fatigues drivers or neighbors.
Use warm color temperature (2700K–3000K, matching incandescent warmth) on slopes to create intimacy and avoid the cold, institutional feel of bright white LEDs. Avoid uplighting into neighbors’ properties, keep light directed down and on your own landscape. Install dimmers or motion sensors on less-trafficked areas to reduce light pollution and save energy.
Safety codes vary by region, but the National Electrical Code (NEC) requires GFCI protection for outdoor circuits within 6 feet of water or in damp locations. Even if not required by code, it’s smart practice. Use conduit to protect buried cables from damage, and bury cable at least 6 inches deep in areas you won’t be digging. A buried cable marked by flags prevents you or future owners from cutting into it accidentally. If you’re unfamiliar with electrical work, hire a licensed electrician to run the main circuit and transformer: the rest, mounting lights, arranging placement, is often DIY-friendly.