Table of Contents
ToggleMost homeowners face the same landscaping dilemma: a front yard that looks good but demands endless weeding, watering, and mowing. Rock landscaping offers a practical solution that cuts maintenance time dramatically while boosting curb appeal. Whether you’re dealing with a shaded patch, poor soil, or simply want to reclaim your weekends, low-maintenance rock landscaping delivers durability, clean lines, and visual impact without the fuss of traditional plantings. This guide walks you through selecting, designing, and installing a rock front yard that looks intentional and polished for years to come.
Key Takeaways
- Low-maintenance front yard landscaping with rocks eliminates watering, pruning, and seasonal replanting while maintaining curb appeal year-round.
- Crushed granite and pea gravel are the most durable base materials; specify angular stone (not rounded) at 2 to 3 inches deep to effectively suppress weeds.
- Proper underlayment with landscape fabric is non-negotiable and suppresses weeds by 95%, even as gravel settles over time.
- Combine visual interest by mixing 60% fine gravel, 30% larger accent stones, and 10% open space; group decorative rocks in clusters of three to five rather than spacing them evenly.
- Prepare the base thoroughly by clearing existing vegetation, grading for proper drainage, installing edging, and laying fabric before spreading any rock material.
Why Rock Landscaping Is the Perfect Low-Maintenance Solution
Rock landscaping eliminates the biggest pain points of traditional yards: watering schedules, seasonal planting, pest management, and constant trimming. Once installed, rocks don’t need fertilizer, pruning, or replacement. They won’t wilt in drought or rot in wet conditions. A properly prepared rock bed with appropriate underlayment keeps weeds minimal and costs virtually nothing to maintain year-round.
Rocks also adapt to difficult growing conditions. Shaded corners, steep slopes, compacted soil, and poorly draining areas that would choke out plants thrive under rock landscaping. You gain curb appeal while working with your yard’s natural challenges rather than against them. The visual effect is clean, modern, and timeless, far from the tired “rock garden” stereotype of decades past. When paired with strategic hardscaping or a few carefully chosen plants, rock landscaping creates professional-looking front yards that feel intentional and designed.
Choosing the Right Rocks and Stones for Your Yard
Rock selection shapes both the look and maintenance profile of your project. The right material matches your climate, complements your home’s architecture, and requires minimal ongoing adjustment.
Gravel and Crushed Stone Options
Crushed granite, pea gravel, and crushed limestone are the workhorses of rock landscaping. Crushed granite (1/4 to 1/2 inch) offers durability and a refined appearance: it compacts slightly over time, which helps it stay in place. Pea gravel has a softer, rounded look and rolls underfoot more easily, ideal if you want a relaxed aesthetic. Crushed limestone is budget-friendly and excellent for drainage but tends to dust and settle faster than granite.
When ordering, specify angular crushed stone (rough edges lock together) over rounded material, which shifts easily. Standard depth is 2 to 3 inches: anything shallower won’t suppress weeds effectively. For a typical 200-square-foot bed, expect 4 to 6 tons delivered. Crushed granite landscaping provides excellent durability if your climate experiences freeze-thaw cycles.
Larger Decorative Rocks and Boulders
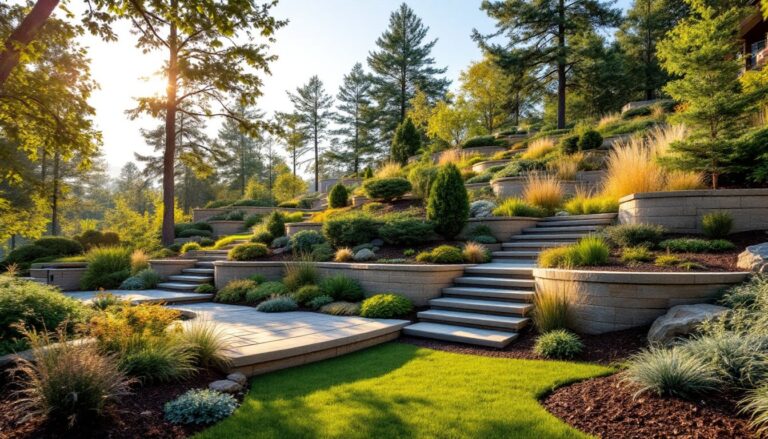
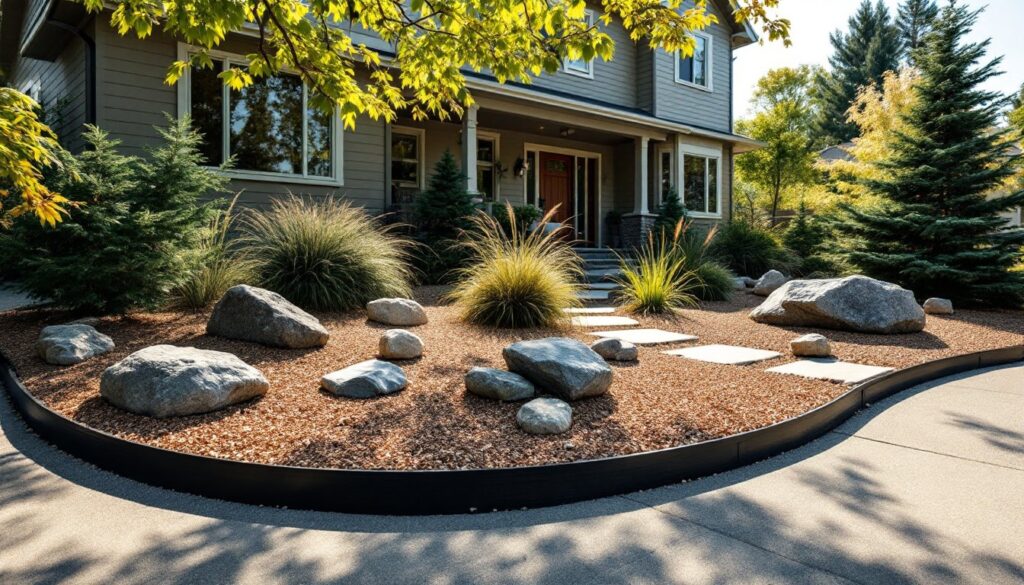
Mixing larger stones into a fine-gravel base creates visual interest and anchors the design. River rocks (smooth, 1 to 3 inches) work well as accents but roll and shift if used as a primary base. Flagstone pieces or stacked slate add architectural weight and break up monotonous texture. Boulders (18 inches and larger) serve as focal points and require proper base preparation, they’ll settle unevenly on loose soil.
Be realistic about weight and placement. A single 2-ton boulder requires careful positioning and may need professional placement. Smaller accent stones (8 to 12 inches) are manageable for DIYers and still create strong visual impact. Local stone suppliers often have options cheaper than imported material: matching your region’s native stone (granite in the Southeast, sandstone in the Midwest, basalt on the West Coast) looks more cohesive and supports local sourcing.
Designing Your Rock Landscape Layout
Before ordering a single stone, spend time observing your front yard at different times of day. Note sunny and shaded areas, drainage patterns after rain, and sight lines from the street. This 20 minutes of observation prevents costly missteps.
Start by sketching a simple layout on paper or using a smartphone aerial view. Identify planting beds (if you’ll include a few shrubs or grasses), hardscape zones (pathways, entry borders), and focal points. Rock-only yards work best with visual variation, combine gravel of different sizes, group larger stones, and leave negative space rather than filling every inch. A common proportion is 60% fine gravel, 30% larger accent stones, and 10% open space or planted areas.
For a practical, small front yard landscaping approach, define borders clearly. Rock wants to spread into planting beds and lawn if given the chance. Metal or plastic edging (6 to 8 inches deep) contains gravel and looks intentional. Curved borders feel softer than rigid lines: straight borders suit modern homes. Group taller decorative rocks (12+ inches) in clusters of three or five rather than spacing them evenly, nature clusters, geometry spaces evenly. When combined with landscaping ideas for front yards, rock-based designs feel intentional and curated rather than afterthoughts.
Installation Steps for a Rock Front Yard
Proper installation is where most DIY rock projects succeed or fail. Take time with prep: it determines whether you’re adding rocks every season or enjoying a stable bed for years.
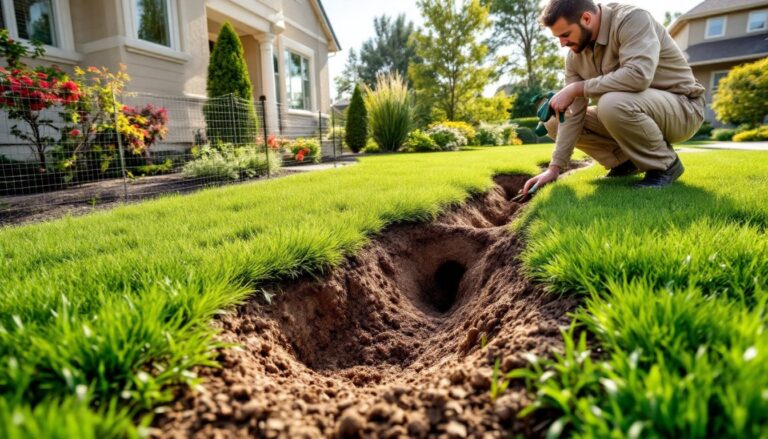
1. Clear the area. Remove all existing grass, weeds, and plant material. A flat shovel, mattock, or rented sod cutter works well. Get down to bare soil: left-behind roots and seeds will sprout through gravel.
2. Grade and level. Uneven ground causes water pooling and settling. Rake and tamp the area, creating gentle slope away from your home’s foundation (at least 1/4 inch per foot for drainage). High spots get more traffic: low spots collect water and create weeds.
3. Install edging. Nail or stake metal or plastic landscape borders around the perimeter. This single step stops gravel creep and creates professional definition. Bury the edge 2 inches into soil: leave 1 to 2 inches above grade.
4. Lay underlayment. This is non-negotiable. A sturdy landscape fabric (black polypropylene, 4 oz minimum) or groundcover suppresses weeds by 95%, even when gravel settles. Cut X’s for any plants you’re installing. Overlap fabric edges by 6 inches: secure with landscape pins. Skip this step, and you’ll be pulling weeds for years.
5. Add a stabilization layer (optional but worth it). A 1-inch layer of recycled asphalt or crushed stone fines beneath finer gravel locks everything in place and reduces dust. This is especially smart in high-traffic areas or sloped yards.
6. Spread gravel. Pour crushed stone to 2 to 3 inches deep. Rake level and compact lightly with a hand tamper or the back of a shovel. Don’t tamp too hard: you want slight compaction, not a concrete-hard base.
7. Position larger stones. Nestle boulders, flagstones, and accent rocks into gravel, wiggling them to settle. Step back frequently to check alignment and sight lines from the street.
Safety reminders: Wear heavy work gloves when handling stone and metal edging, sharp edges cut easily. Use steel-toed boots if moving boulders: dropped stone is a serious foot hazard. When renting equipment like a sod cutter, follow all manufacturer safety instructions. Back strain is real, bend at knees, not your back, when shoveling or lifting. If a boulder exceeds 50 pounds and your yard has limited access, rent a hand truck or call a professional.
Conclusion
Rock landscaping transforms a high-maintenance front yard into a durable, attractive space you’ll actually enjoy. The key is choosing appropriate materials for your climate, prepping the base properly, and resisting the urge to pack every square foot with stone. When done well, a rock yard looks intentional and modern while freeing up your weekends. Start with a single bed, build on that success, and you’ll find yourself wondering why you ever spent summers pulling weeds.